Bold brown cabinetry paint: A prep guide for your home

Maintaining your painted cabinets involves regular cleaning, timely touch-ups for scratches, avoiding moisture damage, and using proper cleaning products to ensure a long-lasting, beautiful finish.
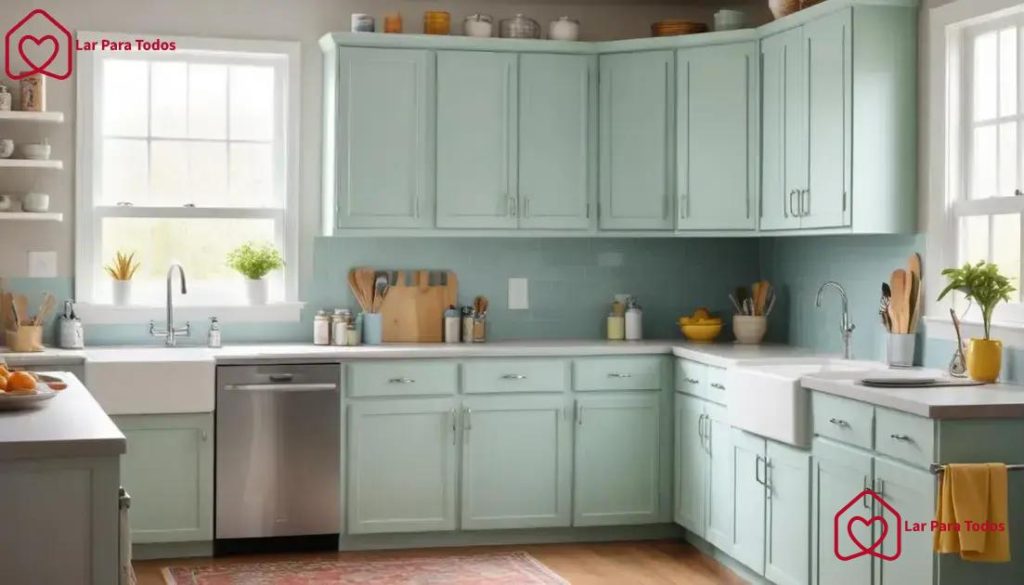
Bold brown cabinetry paint can transform your kitchen, adding warmth and sophistication.
If you’ve been thinking about refreshing your cabinets, you’ve come to the right place!
Let’s dive into how to choose the best paint and prep your cabinets for an amazing makeover.
Choosing the right bold brown cabinetry paint
Choosing the right bold brown cabinetry paint for your cabinets is essential to achieve that perfect look in your kitchen.
With so many shades and finishes available, it can be overwhelming.
The right bold brown cabinetry paint will not only enhance the beauty of your cabinets but also fit seamlessly into your overall kitchen decor.
Factors to consider
When selecting the perfect bold brown cabinetry paint, keep these factors in mind:
- Shade: Consider warm versus cool tones.
- Finish: Decide between matte, satin, or glossy.
- Lighting: Assess how different lights in your kitchen will affect the color.
Another approach is to test out samples. Applying swatches on your cabinets can show how the paint interacts with your kitchen’s lighting.
Make sure you see how the color looks at different times of the day to ensure it meets your preferences.
Popular brown paint shades
Some trending shades include:
- Espresso: A deep, rich brown perfect for modern kitchens.
- Walnut: Offers a warm, classic feel.
- Chestnut: A lighter option, ideal for a cozy ambiance.
Selecting the right bold brown cabinetry paint can significantly impact your kitchen’s aesthetic.
By focusing on factors such as shade, finish, and the lighting in your space, you’ll find a paint that ties your kitchen together beautifully.
Preparing your cabinets for painting
Preparing your cabinets for painting is a crucial step to ensure a smooth and durable finish.
You want to make sure everything is in order before you start.
With proper preparation, your bold brown cabinetry paint will have a professional look and last longer.
Cleaning your cabinets
Start by thoroughly cleaning your cabinets. Use a mixture of warm water and a mild detergent to remove grease and grime.
If you notice any residues, consider using a degreaser. This ensures that the paint adheres well to the surface.
Sanding the surface
Next, sanding is essential for creating a good bond between the cabinets and paint.
Use a fine-grit sandpaper to lightly sand the surfaces. This will help the paint stick better.
Make sure to sand edges and corners where the paint might chip easily.
- Use a vacuum: to remove dust after sanding.
- Wipe down: the surfaces with a damp cloth for a smooth finish.
- Avoid heavy sanding: which can damage the wood.
Now, it’s time to fill in any holes or imperfections. Use a wood filler to smooth out these areas.
Let it dry completely and sand it down until it’s flush with the surrounding wood.
Taping and protecting areas
Before painting, use painter’s tape to cover areas you don’t want to paint.
This will protect walls, countertops, and hardware from accidental paint splatters.
Make sure the tape is applied neatly to ensure clean lines when you begin to paint.
Once everything is set, you’re ready to dive into painting your cabinets.
Proper preparation, including cleaning, sanding, and taping, will yield great results.
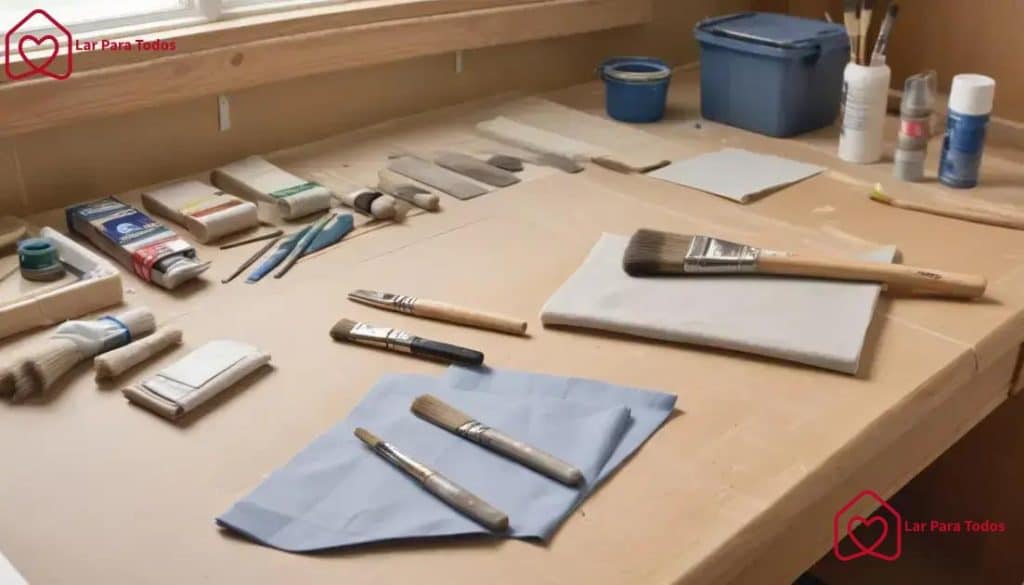
Essential tools for a smooth paint job
Having the right tools is crucial for achieving a smooth paint job on your cabinets.
With the right supplies, you can make the painting process easier and more efficient.
Here are some essential tools you’ll need for a successful project.
Basic painting supplies
First, you must gather the basic painting supplies. These include:
- Paintbrushes: Use high-quality brushes to avoid streaks.
- Rollers: Great for covering larger areas quickly.
- Paint tray: Makes it easier to load your brushes and rollers.
Each type of brush and roller serves a different purpose. For instance, angled brushes are perfect for corners, while flat brushes are great for large, flat surfaces.
Prep tools
To prep your cabinets effectively, ensure you have these tools on hand:
- Sandpaper or sanding block: Necessary for smoothing surfaces before painting.
- Painter’s tape: Helps to protect areas you don’t want to paint.
- Drop cloths: Protects your floors and surrounding areas from spills.
By meticulously preparing your space, you minimize cleanup and ensure a cleaner paint application.
Finishing touches
After painting, a few finishing tools can make a big difference. Consider having these ready:
- Clear sealer: Protects your paint job and enhances durability.
- Putty knife: Useful for small touch-ups or filling holes.
- Foam brushes: Ideal for applying sealers without leaving marks.
Having the right tools for your paint job makes the process smoother.
With proper support and supplies, your painted cabinets will turn out beautifully.
Step-by-step painting process
The step-by-step painting process for your cabinets is crucial to achieving a beautiful and professional finish.
Following the right order ensures that everything goes smoothly and each layer has ample time to dry.
Let’s break it down into manageable steps.
1. Start with primer
Applying a high-quality primer is vital for adhesion and coverage.
Choose a primer that suits your cabinet material. Use a brush or roller to apply an even coat.
Allow the primer to dry completely before moving on to the next step.
2. Choose your paint
Now it’s time to select your paint. Opt for a paint that is durable and suitable for cabinetry.
A satin or semi-gloss finish works well as it’s easier to clean.
Pour the paint into a tray and mix thoroughly.
3. Apply the first coat
Using a clean brush or roller, apply the first coat of paint.
Start at the top of the cabinets and work your way down. Use long, even strokes to create a smooth finish.
Don’t forget the edges and corners.
- Tip: Be careful not to overload your brush.
- Tip: Brush in the direction of the wood grain.
4. Drying time
After you complete the first coat, allow it to dry according to the manufacturer’s instructions.
This could take a few hours or overnight, depending on the paint used.
5. Sanding between coats
Once the first coat is dry, lightly sand the surface with fine-grit sandpaper.
This step helps to ensure better adhesion for the next layer.
Wipe away the dust with a damp cloth before proceeding.
6. Apply additional coats
Apply a second coat following the same method as before.
Often, two to three coats will provide a rich depth of color and a polished look.
Always allow adequate drying time between coats.
7. Final touches
Once the final coat is dry, inspect your cabinets for any imperfections.
Use a small brush for touch-ups as needed. Finally, allow the paint to cure fully before reattaching hardware and using the cabinets.
Finishing touches for cabinetry
Finishing touches are essential for achieving a polished look for your bold brown cabinetry paint.
These small details can greatly enhance the overall appearance and durability of your painted cabinets.
Taking the time to focus on these elements can make a significant difference in the final result.
1. Inspect your work
After the final coat of paint has dried, carefully inspect your cabinets.
Look for any imperfections, such as runs, drips, or uneven areas. Use a fine brush to touch up these spots, ensuring a flawless finish.
2. Apply a clear coat
Applying a clear coat can protect your cabinetry from scratches and stains.
Choose a polyurethane clear coat designed for cabinets. Apply it using a clean brush in thin, even layers.
Let each layer dry fully before adding another.
- Tip: Consider using a satin finish for a subtle sheen.
- Tip: Make sure the clear coat is compatible with your paint.
3. Reattach hardware
Once everything is dry, it’s time to reattach the hardware. Make sure to align the knobs and handles evenly for a professional look.
If you’ve painted the hardware, ensure they are completely dry before installation.
4. Add cabinet liner
Adding a liner inside your cabinets can protect the surfaces and add a nice touch.
Choose a liner that complements your cabinetry. It can also help reduce noise when you close doors and drawers.
5. Final cleaning
Before using your cabinets, give them a final cleaning.
Wipe down all surfaces with a mild cleaner to remove any dust or residue from the painting process.
This will leave your cabinets looking fresh and new.
By taking these finishing touches seriously, you can ensure that your cabinetry not only looks good but also stands the test of time.
Proper attention to detail will result in a beautiful and functional kitchen space.
Maintenance tips for painted cabinets
Maintaining your painted cabinets is essential to keep them looking fresh and vibrant.
With regular care, your cabinets can stay beautiful for years to come.
Here are some simple maintenance tips to help you preserve your bold brown cabinetry paint.
1. Regular cleaning
Clean your cabinets regularly to remove dust, grease, and grime.
Use a soft cloth dampened with a mixture of warm water and mild soap. Avoid abrasive cleaners, as they can scratch the paint finish.
Gently wipe the surface, and be careful around the edges where dirt tends to build up.
2. Avoid excessive moisture
Moisture can weaken the paint and cause it to chip. Make sure to immediately wipe up any spills and avoid using excessive water when cleaning.
Use coasters or mats under frequently used items to prevent moisture damage.
3. Touch up scratches
Over time, scratches may appear on your cabinets. Keep a small bottle of matching paint handy for simple touch-ups.
For minor scratches, simply dab a little paint onto the affected area and blend it in with a clean brush.
This will help maintain the overall look of your cabinets.
4. Protect against heat
Keep hot pots and pans away from cabinet surfaces.
Heat can damage the paint and finish. Use trivets or stovetop protectors to shield your cabinets from heat damage.
This simple step can help prevent discoloration and peeling.
5. Check for wear
Regularly inspect your cabinets for signs of wear or damage. Look for peeling paint, loose hardware, or any other issues.
Addressing these problems early can prevent more extensive repairs down the line.
By following these maintenance tips, you can prolong the life of your painted cabinets.
Keeping them clean, protected, and well-maintained will ensure that they continue to enhance your kitchen’s beauty.
FAQ – Frequently Asked Questions about maintaining bold brown cabinetry paint
How often should I clean my bold brown cabinetry paint?
You should clean your painted cabinets regularly, ideally once every few weeks, using warm, soapy water to keep them looking fresh.
What should I do if my cabinets get scratches?
Keep touch-up paint handy. For minor scratches, simply apply a little matching paint to the affected area and blend it in.
Can I use any cleaner on my painted cabinets?
No, avoid abrasive or harsh cleaners as they can scratch the paint. Stick to mild soaps and warm water for cleaning.
How can I protect my cabinets from moisture?
Wipe up spills immediately and use mats under items to minimize contact with moisture, which can damage the paint.