
Checkerboard tile diy kitchen or bath ideas
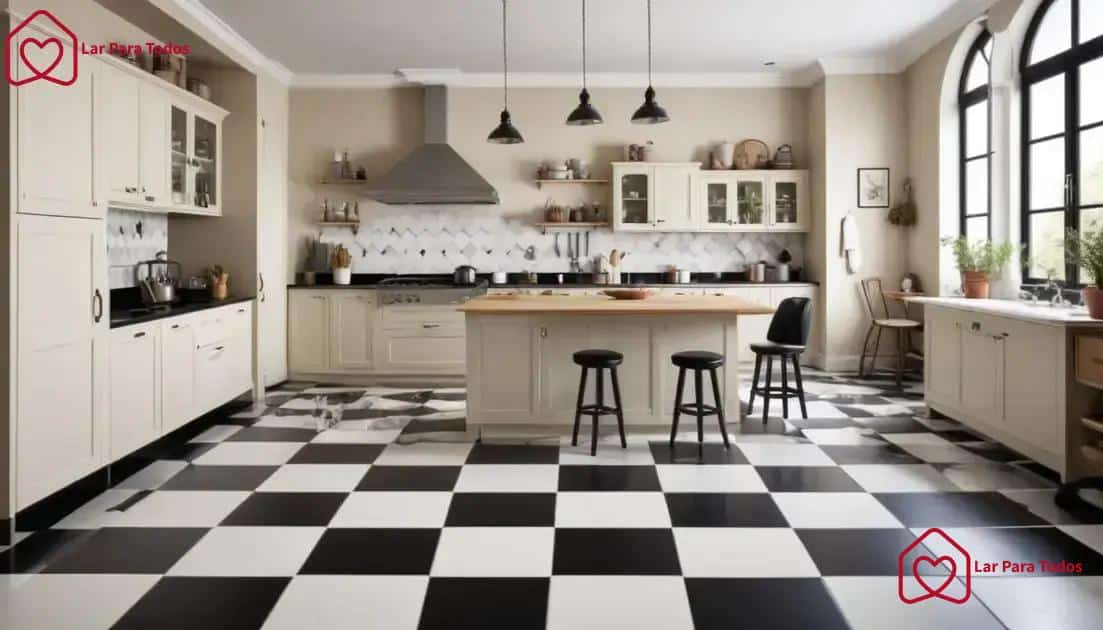
Checkerboard tile DIY projects elevate any kitchen or bath. They combine classic style with easy upkeep and customization. Color and texture make each space unique.
Adding a checkerboard tile pattern enhances visual appeal. It transforms plain rooms into elegant, timeless interiors. This simple upgrade delivers big design impact.
Checkerboard layouts are easy to install and maintain. The result feels professional yet personalized. Let’s explore how to create your perfect version.
Understanding checkerboard tile patterns
Checkerboard tile patterns bring order and contrast. They blend functionality with enduring visual balance. Understanding their structure helps guide your design.
Alternating squares create a rhythmic and symmetrical flow. Classic black and white remain popular choices. However, soft hues can modernize the effect.
Patterns adapt well to both large and small areas. Proper scale enhances depth and proportion. Harmony defines a successful checkerboard space.
Types of Checkerboard Patterns
Classic patterns rely on high-contrast combinations. Black and white remain timeless for all interiors. They suit modern or vintage homes alike.
Soft pastel variations offer a lighter, playful vibe. These colors add charm to compact bathrooms easily. Neutral shades keep designs calm and airy.
Glossy versus matte finishes change the mood. Shine adds brightness, while matte brings texture. Select one that complements your decor theme.
Where to Use Checkerboard Tiles

Checkerboard tiles suit multiple areas beautifully. Kitchens and bathrooms benefit from their definition. They frame space with a clean visual rhythm.
Install them on floors or walls for emphasis. Entryways also make strong design statements. Each surface gains energy through contrast.
Smaller spaces feel larger with diagonal layouts. Light reflection increases openness instantly. Pattern placement truly shapes perception.
Materials needed for a successful diy project
Preparation defines any DIY tile project success. Gathering every material before work saves time. It ensures smoother progress from start to finish.
Choose high-quality tiles and strong adhesive first. Non-slip surfaces provide safety and durability. Grout color influences your overall aesthetic outcome.
Reliable materials reduce long-term maintenance issues. Plan ahead to avoid shortages mid-installation. A detailed checklist makes the process efficient.
Essential Tools for Your Project
Precision tools create professional-quality installations fast. Tile cutters deliver clean, even edges consistently. Levels help maintain straight, balanced lines.
Notched trowels apply adhesive evenly across surfaces. Grout floats fill joints neatly without waste. Simple instruments guarantee impressive visual results.
Consistent measurements prevent uneven layouts later. Checking alignment regularly keeps symmetry intact. Attention to detail defines craftsmanship.
Additional Supplies to Consider
Stock cleaning tools like sponges and cloths nearby. These remove grout residue before it dries fully. Proper cleanup keeps finishes polished and smooth.
Measuring tape ensures precise tile placement accuracy. Small miscalculations can disrupt entire designs. Accuracy remains the key to perfection.
Safety gear protects you throughout installation work. Use gloves, goggles, and stable footwear always. Comfort and safety improve overall experience.
Step-by-step guide to creating your perfect tile design
A step-by-step plan ensures successful DIY execution. Mapping your space avoids material waste completely. Clarity builds both confidence and consistency.
Start with measuring the total surface accurately. Add extra for cutting errors or replacements. Preparation minimizes future frustration later.
Then visualize your ideal layout on paper. Testing orientations refines your final arrangement. Planning helps avoid last-minute mistakes.
Choosing Your Tile Layout
Layouts determine the mood of the entire space. Traditional grids emphasize classic sophistication instantly. Diagonal options modernize the visual direction.
Mix colors or finishes for playful personality. Balanced contrast adds excitement without chaos. Each combination tells a unique story.
Experiment virtually or with tile samples first. Seeing options simplifies decision-making quickly. Visualization prevents design regret later.
Preparing the Surface
Smooth surfaces make tile adhesion stronger overall. Clean thoroughly before adding adhesive mixture. Residue weakens bonding and shortens durability.
Repair cracks or uneven flooring beforehand carefully. Fill gaps to create consistent, level alignment. Preparation secures professional-quality installation.
Ensure the area is dry before applying mortar. Excess moisture delays curing and causes slipping. Patience guarantees better long-term results.
Grouting Your Tiles
Allow adhesive to cure completely before grouting. Rushing this step compromises tile stability badly. Patience protects your work investment.
Spread grout using a float in diagonal motions. Press gently to fill gaps uniformly tight. Remove surplus before it hardens permanently.
Seal grout lines to protect against staining later. Regular maintenance preserves shine and texture. Proper sealing extends design longevity.
Tips for maintaining your checkerboard tiles
Maintenance keeps checkerboard tiles bright and elegant. Routine care prevents dirt from dulling colors. Gentle cleaning sustains long-lasting appeal.
Sweep or vacuum regularly to remove debris. Dust accumulation scratches surfaces over time. Prevention ensures a flawless polished finish.
Mop using mild detergent and warm water only. Avoid harsh chemicals that erode grout lines. Consistency ensures enduring beauty daily.
Choosing the Right Cleaning Products
Pick pH-neutral solutions safe for ceramic tiles. They clean efficiently without stripping gloss. Protection preserves both texture and tone.
Avoid bleach or acid-based formulas completely. Harsh agents discolor grout and weaken bonds. Gentle cleansers maintain shine effectively.
Check manufacturer instructions for compatibility always. Following guidance extends tile performance lifespan. Care translates directly to preservation.
Dealing with Stains
Tackle spills immediately before they absorb deeply. Quick action stops permanent discoloration fast. Soft cloths handle most minor issues.
For stubborn stains, use specialized tile cleaners. Apply sparingly following package recommendations precisely. Patience yields professional results safely.
Seal grout periodically to resist future staining. Regular upkeep minimizes cleaning difficulty drastically. Preventive care always pays off.
Preventing Damage
Avoid abrasive pads or metal scrubbers entirely. They leave micro-scratches dulling tile luster. Soft tools protect both surface and color.
Add mats near high-traffic or wet zones. They reduce wear and prevent slips efficiently. Function blends with subtle style easily.
Inspect tiles occasionally for cracks or chips. Prompt repairs maintain uniform appearance overall. Early attention prevents costly replacements.
Creative ideas to personalize your kitchen or bath
Personalizing checkerboard tiles showcases individual creativity. Color and texture choices define unique identity. Your imagination guides final transformation.
Experiment with unconventional shades and hues. Soft blues or greens modernize timeless contrast. Warm tones create welcoming elegance easily.
Layer finishes for subtle depth and balance. Combining matte and gloss enriches visual movement. Texture variation makes rooms more dynamic.
Accent Borders and Feature Walls
Accent borders highlight edges with definition beautifully. Choose complementary tones for cohesive harmony. Borders frame spaces elegantly and neatly.
Feature walls draw focus to specific design zones. Use bold contrasts for striking visual appeal. Simplicity elsewhere enhances statement impact.
Balance proportions carefully within the layout. Overuse can overwhelm smaller rooms quickly. Moderation strengthens aesthetic consistency.
Mixing Patterns and Textures
Blend geometric styles for captivating layered depth. Checkerboards pair well with hexagonal motifs. Variety amplifies creative sophistication greatly.
Mix matte and glossy finishes for dimension. Changing textures influences light interaction effectively. The result feels rich and intentional.
Add mosaic inserts between larger tiles subtly. These accents personalize surfaces without clutter. Creativity thrives through thoughtful restraint.
DIY Tile Artwork
Leftover tiles offer endless artistic opportunities. Frame them to craft custom decorative pieces. Personalized accents enhance every environment naturally.
Arrange fragments into small wall mosaics creatively. Symmetry or randomness both create charm. Artistic reuse prevents unnecessary waste.
Display tile art as focal home decor easily. These handmade touches showcase authentic craftsmanship. DIY adds warmth to any setting.
Conclusion
In conclusion, checkerboard tiles redefine home aesthetics elegantly. They merge tradition with contemporary personalization seamlessly. Every installation becomes a creative statement.
Proper preparation ensures flawless long-term results. Maintenance preserves lasting vibrancy and texture. Simple routines maintain professional-grade quality.
Whether bold or subtle, checkerboard designs endure. Their symmetry inspires timeless visual appeal. DIY transformation brings satisfaction and style.
FAQ – Frequently Asked Questions about Checkerboard Tiles
What are checkerboard tiles?
Checkerboard tiles are square tiles arranged in a pattern of alternating colors, commonly black and white, adding a classic look to any space.
How can I personalize my checkerboard tile design?
You can personalize your design by using different colors, layouts, and textures, or by incorporating unique accents like borders and artwork.
How do I maintain my checkerboard tiles?
To maintain your tiles, regularly sweep and mop them with mild detergent, and seal the grout to prevent staining and damage.
Where can I use checkerboard tiles?
Checkerboard tiles are versatile and can be used in kitchens, bathrooms, entryways, or any space where you want to make a stylish statement.


